Develop locally with extension UI
To develop your UI locally, deploy your extension code and then use the Netlify SDK commands to run a local development server.
The local development server allows you to preview and test your extension UI in the context of the Netlify UI, so you know exactly how your users will experience your UI.
Changes you make while running local dev server impact production
The local development server only controls what the Netlify UI renders in extension UI surfaces. Any changes you make to your teams and projects in the Netlify UI will happen in production, as if you were using the Netlify UI without local development running. This includes actions in your extension surface that result in API calls and changes you make in other sections of the Netlify UI. Keep this in mind as you install your extension and test.
Start local development
Section titled “Start local development”To start local development, follow these steps:
-
After you’ve created a new extension that contains extension UI, deploy and publish your extension as a private extension on Netlify. Once published, the extension will only be visible for your team.
-
Update the slug in your
extension.yamlto match the slug for the published extension. The slug should include the nanoid that Netlify UI automatically prepended to the slug when you published the extension.- In the Netlify UI, select the Extensions tab for your team and select Created by your team.
- Find the extension you just created and select it to go to the extension’s details page.
- Select Manage and find the Slug under Details.
- Copy the slug and paste it in your project’s
extension.yamlfile. - Commit the update to Git, push the change to your repository, and redeploy the project that hosts your extension code.
If you don’t want to update this in your configuration file, you can specify it in the local development settings (step 5 below) or by using the
--slugflag. -
Install the Netlify CLI, if you haven’t already, and then run
netlify loginto login and authenticate your account. -
Run the following Netlify SDK command to start the local development server:
npm run dev --openThis command will start a local server and automatically open your browser to the extension development settings page in the Netlify UI. The unique URL for this page will also be printed in the terminal for easy access. Only the authenticated user can access this URL.
Make sure your project has a dev script
When you use the SDK’s guided setup flow to create an extension, we automatically add a script to your project that runs the
netlify-extension devcommand. If you skipped the guided setup flow, make sure you install the Netlify SDK in your project, and manually update yourpackage.jsonto include"dev": "netlify-extension dev" -
On the local extension development page, review and save your settings to begin developing your extension UI locally.
By default, the settings use the URL of your local server and the extension’s slug from the
extension.yamlfile. The slug should match the slug of your published extension. If you did not update yourextension.yamlin step 2, you should update the slug in these settings.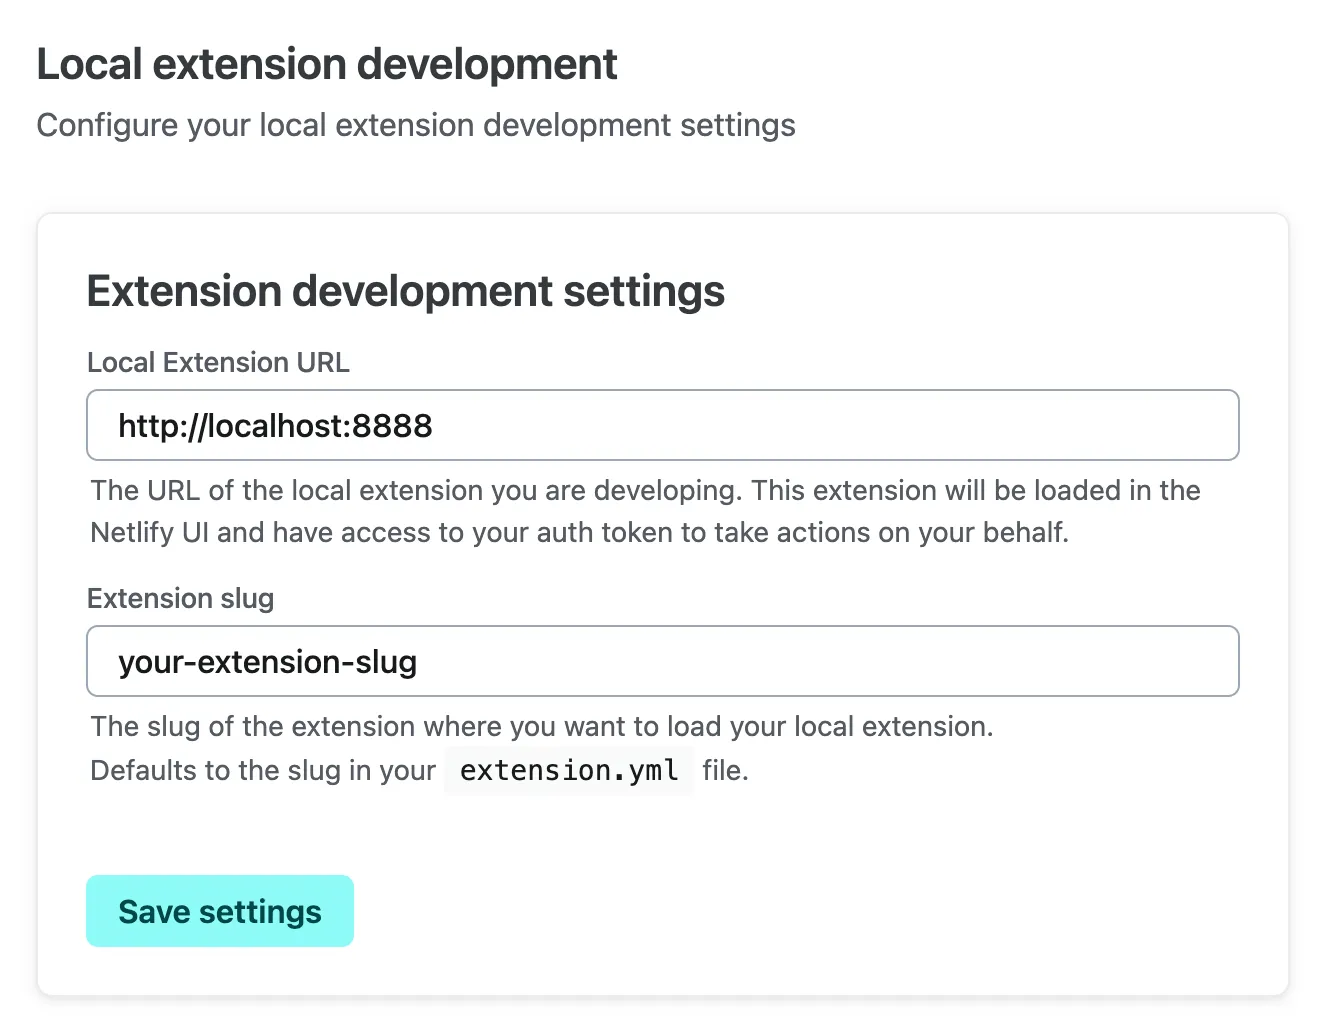
These settings are saved in your browser’s local storage and will persist across sessions so only you will be able to access the local development version of the extension.
-
Next, install your private extension on your team. Because this action occurs outside of your extension surface, this will actually install the extension on your team in production and it will remain installed even after you stop the local development server.
- Select your team name at the top of the Netlify UI.
- Select Extensions > Created by your team.
- Find your private extension in the list and select it to go to the extension’s details page.
- Select Install.
You can now navigate to any section of the Netlify UI that renders your extension’s surface, and the Netlify UI will load the surface using the local development URL instead of the deployed version.
Please keep in mind that any changes you make in the Netlify UI will impact production, as if you were using the Netlify UI without local development running. This includes actions in your extension surface that result in API calls and changes you make in other sections of the Netlify UI.
Now that you’ve successfully started the local development server, your browser will automatically update and reflect changes to your extension UI while you work. The only exception to this is when you add or remove surfaces, as noted in the next section.
Redeploy when adding or removing surfaces
Section titled “Redeploy when adding or removing surfaces”When you run npm run dev --open, the local development server refers to the extension.yaml file in the private extension that you published on Netlify (step 1 above) to determine what surfaces to render in the Netlify UI.
If you change the extension’s configuration file to add or remove surfaces, you need to push the code to your repository and redeploy the project that hosts your extension code before you can preview it locally.
For more details, review the documentation on how to update and release extension versions.
Stop local development
Section titled “Stop local development”Once you’re done testing locally, follow these steps to stop local development and clear the local settings stored in your browser.
- Stop the dev command process running in your terminal.
- In your browser, navigate back to the extension UI settings and select Delete settings.
After you delete these settings, the Netlify UI will stop using the local version of your extension and will render the deployed surfaces from the published extension instead.
Additional development options
Section titled “Additional development options”To further customize your local development environment, the Netlify SDK’s dev command offers several options:
Automatically redirect to a surface
Section titled “Automatically redirect to a surface”If you want the Netlify UI to redirect you to a specific page within the Netlify UI after starting the local server, use the --redirect flag. This is particularly useful for quickly navigating to the surface where your extension is rendered.
npm run dev --open --redirect /extensions/your-extension-slugThis command will open your browser to the extension settings page and then automatically redirect to the specified path.
Override the extension slug
Section titled “Override the extension slug”If you’re developing a new version of an existing extension and want to test it in the same surfaces, use the --slug flag to override the slug in your extension.yaml file. This lets you simulate how the new version will behave without altering the original extension.
npm run dev --open --slug some-other-extension-slugThis command starts the local server and renders the UI in surfaces for the specified slug instead of the ones defined in your extension.yaml file.
Next Steps
Section titled “Next Steps”Now that you can preview your extension in the Netlify UI and you can make changes locally that are immediately reflected in your browser, learn how to create a new surface.