Imagine your team is building a new product filtering system for an e-commerce site.
You need to test and refine it before launch, but managing multiple environments—feature, staging, release, and production—is a headache. Many teams rely on complex scripts, configurations, and manual tasks to manage environments. These chores increase the risk of misconfiguration, deploying the wrong data, and manual intervention.
Netlify’s branch-matching environment variables and branch deploys make this process simpler. Instead of complex deployments and environment variable matching for each stage, you define rules once, and Netlify automatically applies the correct settings based on the branch name.
Let’s explore how this works.
#Common deployment workflows
Suppose your team works by developing new features on feature branches before releasing them to customers. While building the product filtering system for an e-commerce site, you want to test and refine it across multiple environments before launch.
But this likely isn’t the only thing your team is working on. There may be dozens of branches in active development—new checkout optimizations, bug fixes, design updates—all moving through their own testing and deployment pipelines. Keeping track of everything, ensuring each environment has the right configurations, and preventing conflicts can quickly become overwhelming.
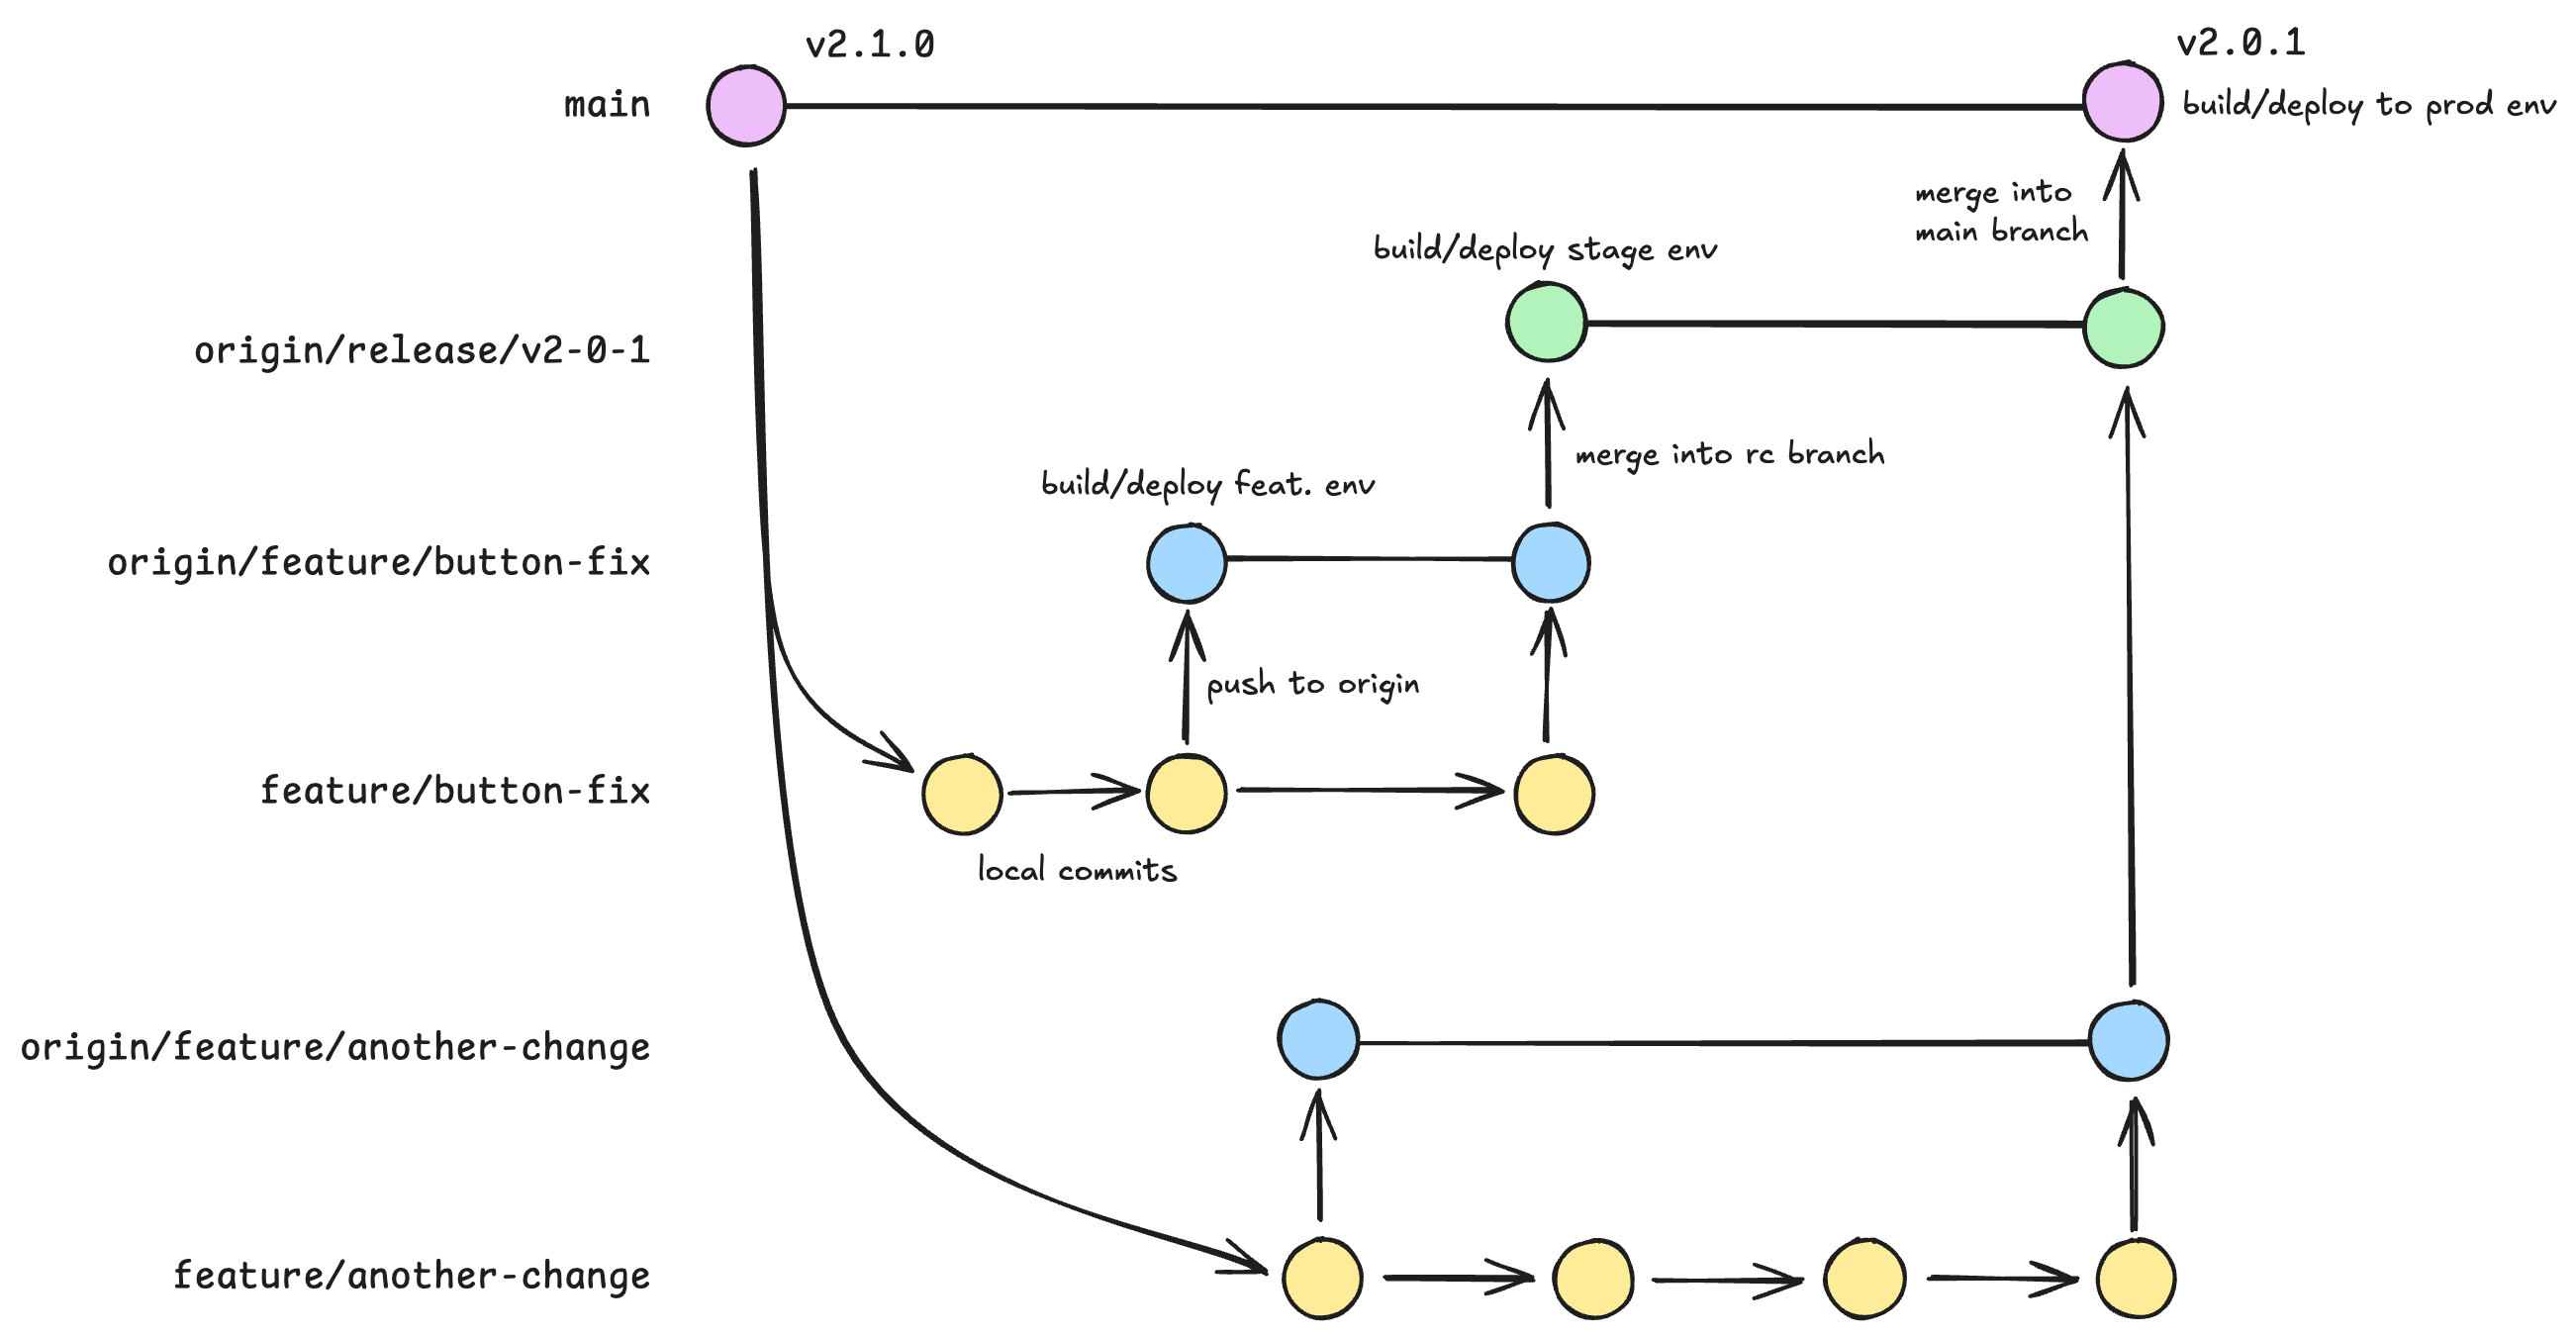
A typical workflow for the product filtering system might look like this:
-
Feature branch: The work starts as a feature branch local on your machine, typically checked out from the most recent version of main. You’ll write the code to refine search capabilities—sorting by price, category, or availability—using mocked product data to avoid interfering with live inventory.
-
Feature preview: When ready, you open a pull request against the branch that will serve as the next release candidate, named something like
release/v2.1.1. Each push to this remote branch kicks off a unique deployment so that QA can review the effect of this work against the current work ready to be released. This environment would use mocked data. -
Release branch: Once the feature gets merged into the release branch, it kicks off another build for a release-specific environment. This environment mirrors production more closely, using live product data to verify pricing accuracy, availability, and search performance before rollout.
-
Production: After final approval, the feature is merged into production—just one of many ongoing deployments that need to be managed without disrupting existing functionality.
#Challenges with typical workflows
With multiple teams, branches, and deployment stages in motion, keeping environment variables properly configured becomes a constant challenge. Each environment requires different API keys, database connections, and other sensitive configurations. Without a clear system, teams often struggle with:
- Manual misconfigurations: Copying and pasting
.envfiles increases the risk of using incorrect credentials. - Complicated setup: Teams rely on custom scripts or third-party tools to manage branch-specific settings.
- Time-consuming updates: Each deployment requires careful manual adjustments to avoid issues.
- Risk of errors: A single mistake can lead to broken features, exposure of sensitive data, or incorrect pricing in production.
Managing this complexity manually is error-prone and inefficient.
#Simplified workflow with Netlify
This is where Netlify’s branch-specific environment variables and branch deploys come into play. Instead of manually configuring environment variables for each branch and worrying about the deployment process, Netlify can help automate the workflow by applying the correct configurations based on the branch type and name.
Let’s take a look at how this works.
#Stage 1: Feature Development
Suppose your team works by creating feature branches with this format: feature/product-filtering. To enable feature branches, go to your Netlify settings and configure branch deploys. This will automatically create a unique subdomain for each branch, like product-filtering--your-site-name.netlify.app, for testing and previewing features.
#Testing in an isolated environment
If you have configured branch-matching variables to do so, Netlify will deploy this feature branch using your mocked product data. This allows your team to develop the feature in a real storefront environment without affecting live product listings, pricing, or inventory data.
#Deploy previews for pull requests
By default, Netlify provides Deploy Previews for pull requests. When a pull request is opened, Netlify automatically builds and deploys a preview of the changes to a unique URL, typically formatted as deploy-preview-<PR-ID>--your-site-name.netlify.app. This allows you to test and review changes in an isolated, live-like environment without affecting production data.
#Using mock data for safe development
You can define environment variables for branch prefixes like feature/* in the UI or via the CLI. In this case, you might set up environment variables that point to a mock API, so the feature works with simulated data. This approach helps prevent the risk of exposing sensitive production data during the development process. More on this below.
While you work, Netlify’s build logs provide detailed insights, helping you troubleshoot issues such as missing environment variables or failed API calls. Your marketing team can also preview the feature, provide feedback, and make suggestions—again, without any risk to production data.
#Stage 2: Release Candidate
Once the feature is developed and reviewed, your team might merge the branch into a release/* branch (e.g., release/3.0). If branch deploys are enabled for release/* branch names, Netlify would then deploy the release/ branch using production-like data, such as real product listings and inventory levels, while keeping it separate from the live site.
#Testing with production-like data
Branch deploys ensure that every branch, such as release/*, gets its own unique deploy URL (e.g., release-3-0--your-site-name.netlify.app). During this phase, your team can run performance checks and test the filtering system with real customer data. This ensures the feature can handle actual traffic, including product selection patterns and customer interactions.
#Ensuring environment consistency
By having separate deployments for feature/* and release/* branches, you can ensure that each branch has the appropriate environment settings, and there’s no risk of misconfigurations between the different stages.
Note:
With automatic deploy subdomains, you can set up branch deploy URLs to share a subdomain with the production site, making it easier to test services that require the same domain.
#Stage 3: Production Deployment
After the feature passes final review, your team could merge the release/* branch into your designated production branch (e.g., main or production) to trigger the final deployment, pushing the feature live. The production deployment is automatically handled by Netlify with live data from the production environment. The deployment URL, such as your-site-name.netlify.app, would serve the updated feature with live product data, and users would see the new functionality in production.
#Rollback for stability
If anything goes wrong, your team can easily roll back to the previous stable release, ensuring customers aren’t impacted by any issues.
This process ensures smooth iteration, realistic testing, and quick recovery in case of surprises.
#Configuring branch-matching environment variables
Netlify supports configuring environment variables for groups of branches that share a common prefix. Instead of manually assigning variables to each branch, you can automatically apply settings to all branches matching a given pattern, such as release/* or feature/*.
#Wildcards for branch-specific configurations
Using the * wildcard in your branch names simplifies the process of applying environment variables to a group of branches. For example:
feature/*branches → Use mock APIs, databases, and test credentials to keep development isolated from live data.release/*branches → Use real APIs, production databases, and live credentials to simulate a production-like environment.
To set this up:
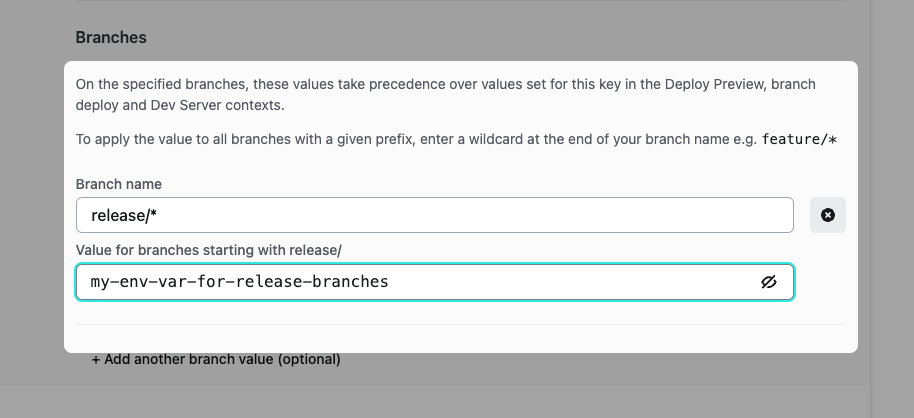
- Navigate to Site configuration > Environment variables in the UI.
- When adding an environment variable, specify a branch pattern using a wildcard (
*) at the end of the branch name. For example:- Setting
release/*will apply the variable to all branches starting withrelease/, likerelease/1.2,release/alpha-0.0.1, etc. - Similarly, setting
feature/*applies the variable to all branches starting withfeature/.
- Setting
Note:
Don’t forget to mark your sensitive environment values as secret!
By using wildcards, you ensure that all relevant branches inherit the correct settings automatically.
#Supercharging branch deploys
You can also configure branch deploys to match specific prefixes to streamline your deployment workflows. To set up deploys for specific branches or branch prefixes:
- Go to Site configuration > Build & deploy > Continuous Deployment > Branches and deploy contexts.
- Select Let me add individual branches to configure specific branches, or use the wildcard (e.g.,
feature/*) to deploy all branches starting with that prefix.
Additionally, you can configure Netlify to deploy all new branches automatically (excluding the production branch) by selecting All in the Branch deploys section.
#In closing
By leveraging Netlify’s branch deploys and branch-matching environment variables, your team can streamline your workflow and reduce the complexity of managing different environments. This workflow also sets the foundation for more advanced strategies, such as blue/green deployments or canary releases, enabling safer and more controlled releases with minimal overhead.
What challenges have you faced with managing environments? Let us know!