Netlify Async Workloads brings a powerful new dynamic to how developers create reliable websites.
#TL;DR
With Async Workloads, developers can build resilient, scalable, and easy to manage event-based architectures. Here are a few examples:
- Ensure functions always complete, even if an API is down.
- Provide a follow up email before the last day of a trial.
- Send a notification to a user when it makes sense relative to their time zone.
Handling the nuances of durable execution, scheduling, and retrying on a serverless platform can be a very difficult challenge, but not any more!
Let’s walk through how to use Netlify Async Workloads to create durable functions that solve common use cases without all of the complexities that come with building it yourself.
#Some context on what we’re solving
Traditional client/server transactional architecture works well for simple tasks triggered by user actions. However, as systems grow in complexity, they face several challenges. Here are a few examples:
- Direct server-client dependency: the client must communicate directly with the servers responding to their requests. Additional scope or introducing other systems increases complexity and failure points of these interactions.
- Error handling: the server and client must manage failures in their own context. This adds complexity, especially when retrying failed processes or handling external dependencies like third-party APIs. Even if situations with minimal complexity, a transient, multi-hour outage is still a challenge to deal with.
- Timeouts for long-running processes: browsers or users may not wait for extended operations, which interrupts the process and can lead to undesirable or unpredictable results.
- Scaling issues: as data and tasks grow (generating reports or sending thousands of emails, etc.), failure rates increase.
An event-based architecture offers a solution by decoupling components. Systems communicate through events, allowing for asynchronous processing and better scalability.
When the client triggers an event (“this thing happened”), and multiple consumers can respond independently, making it easy to scale and handle additional and inter-dependent workloads.
#Enter: Netlify Async Workloads
Async Workloads provides durable, event-based architecture for any Netlify site without requiring developers to handle any of the infrastructure. Let’s break that down.
#Durable execution
Durable execution is a fault-tolerant approach to executing code by dealing with failures automatically with retries and persisted state.
As a result, when (not if!) your code hits issues — network failures, timeouts, rate limits, infrastructure outages, or other transient errors — you can trust that the your code will continue gracefully. Async Workloads turns a standard serverless function into a durable serverless function.
#Event-based architecture
Async Workloads provide an event-based architecture approach to invoking logic.
This means you create functions and specify which events they should respond to. Then, your site can send these events for Async Workloads to route all of the functions that have subscribed to them.
This approach means durable functions can be combined to create countless compositions of processes responding to a site’s unique needs.
#Built on powerful platform primitives
All of this power is delivered on top of Netlify’s serverless offerings. Just like Netlify’s serverless compute, you no longer have to provision, scale-out, and maintain your compute.
Async Workloads delivers durable, event-based architectures that requires no infrastructure to manage, wrapped up in an unparalleled and delightful developer experience.
#Enable Async Workloads
Before we dig into examples, let’s look at how to get Async Workloads setup on a Netlify site.
#Install the extension
Enable the Async Workloads extension for your team by navigating to the Extensions tab from your team’s dashboard.
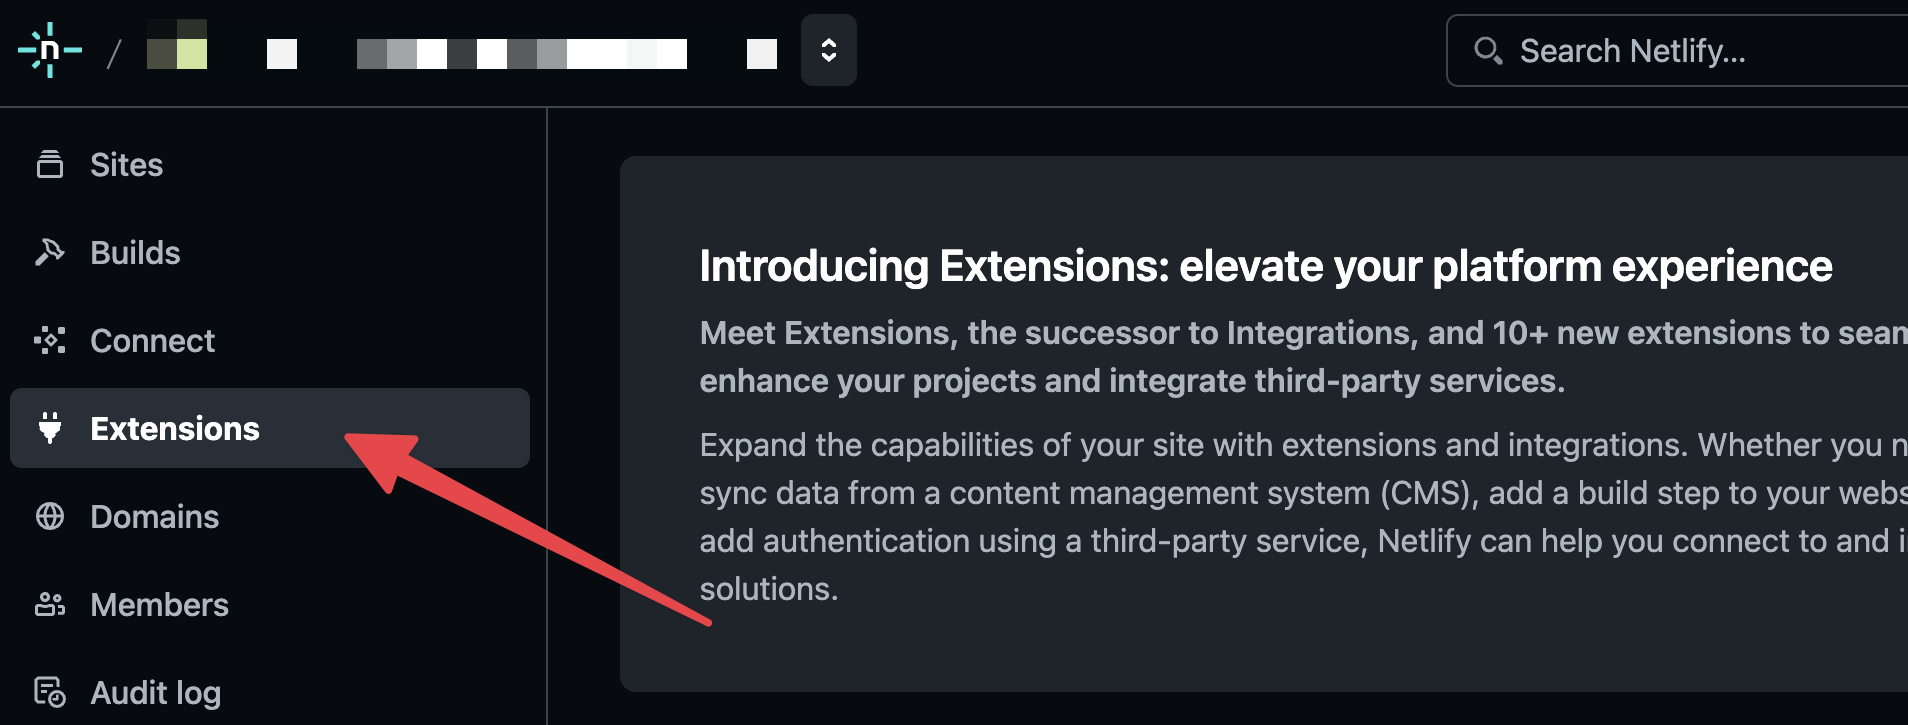
Select the extension and then click the Install button.
#Install dependencies
Once enabled, any team site can write Async Workload functions. You just need to install the @netlify/async-workloads package on the site.
npm install @netlify/async-workloads#Async Workloads in action
Now we’re ready to walk through an example of how to use Async Workloads to build a durable, event-based architecture.
#Basic Async Workload function
Creating an Async Workload function works like creating a standard serverless function.
Add a new function file to your functions directory (netlify/functions by default) with the following content. (Note that the name for the file doesn’t matter because they will be invoked by event names.)
import { asyncWorkloadFn, AsyncWorkloadEvent, AsyncWorkloadConfig } from "@netlify/async-workloads";
export default asyncWorkloadFn((event: AsyncWorkloadEvent) => {  console.log("Hello, Async Workloads!");});
export const asyncWorkloadConfig: AsyncWorkloadConfig = {  events: ["say-hello"],};
Here are the notable parts of this function:
- The logic is placed in a function wrapped with the
asyncWorkloadFn()wrapper, which gives it access to all of the workload information. - We specify that this workload should only be called when the
say-helloevent is sent to the site. - When that event is sent, this function is invoked with the complete event information, including the data sent along with it.
- If there is an issue when executing the function, it will automatically get retried up to four more times with an exponential backoff schedule.
That was it! Such a simple API to automatically provide durable, event-based architecture to your site.
#Invoking an Async Workload
Now that we have an Async Workload function that listens for say-hello events to be fired, we can look at how to trigger it.
Async Workloads provides a client that can be instantiated to conveniently send events and data to our site’s workloads.
Here’s an example of triggering our workload from within another serverless function that handles all of our setup, authentication, etc.
import { AsyncWorkloadsClient } from "@netlify/async-workloads";
export default async (req: Request) => {  // do some work... authenticate the user, pull data, etc.
  const client = new AsyncWorkloadsClient();  await client.send("say-hello");
  return new Response("", { status: 200 });};
export const config = {  path: "/say-hey",};
With this function in place, when a request is sent to /say-hey, the workload function will be invoked and the logs will show Hello, Async Workloads!.
#Advanced triggering
When triggering workload functions in the same site, there’s nothing extra needed. Instantiate the client and start sending!
For more advanced use cases (like calling from outside of the site or from non-JS environments), see the docs for more ways to send events.
#Use case example: create, provision, and bill
Let’s examine how to take a real world use case and make it durable using Async Workloads.
#Provisioning a new user
Here’s a simple example as to how we might handle the process of signing up a user, provisioning their resources, and billing them for it.
export default async (req: Request) => {  if (!authorized(req)) {    return new Response("", { status: 400 });  }
  const user = await createUser();  const resources = await provisionUserResources(user);  const billing = await addUserToBilling(user, resources);
  // inform the system this user is fully set up  await updateUserState("ready", user, resources, billing);
  return new Response(JSON.stringify(user), { status: 200 });};
export const config = {  path: "/setup-user-resources",};
In this example, we’re doing the following:
- Establishing a new user
- Generating all of the resources the new user needs
- Linking the user to the billing platform
#Points of failure
There’s a lot that could go wrong in this process:
- errors with
provisionUserResources()oraddUserToBilling() - billing system is down for an extended period
- the system hit a rate limit provisioning resources
Solving these gets complex fast.
#Using Async Workloads to solve for durable execution
Let’s look at how we implement this with Async Workloads.
We can modify our endpoint to focus on the synchronous parts first and then trigger the Async Workloads to handle all of the background work.
// Example of how we might build this without Async Workloadsexport default async (req: Request) => {  if (!authorized(req)) {    return new Response("", { status: 400 });  }
  const user = await createUser();
  // let's do the core work in the background  const client = new AsyncWorkloadsClient();  await client.send("provision-and-bill", { data: { user } });
  return new Response(JSON.stringify(user), { status: 200 });};
export const config = {  path: "/setup-new-user",};
In our Async Workload, we will trigger an event named provision-and-bill which is where we will include our durable, async logic.
import { asyncWorkloadFn, AsyncWorkloadEvent, AsyncWorkloadConfig } from "@netlify/async-workloads";
export default asyncWorkloadFn((event: AsyncWorkloadEvent) => {  // get the user data  const { user } = event.eventData;  // do the provisioning and billing work  const resources = await provisionUserResources(user);  const billing = await addUserToBilling(user, resources);  // inform the system this user is fully set up  await updateUserState("ready", user, resources, billing);});
export const asyncWorkloadConfig: AsyncWorkloadConfig = {  events: ["provision-and-bill"],  // optionally, we can ensure a user is always provided before allowing this  // workload to be invoked.  eventFilter: (event) => {    return event.eventData.user !== undefined;  },};
When sending provision-and-bill with a user object in the event data, we will do the same work for provisioning resources and adding user to billing.
But now, if any part of this process fails, we will retry automatically up to four additional times (by default). If it fails all attempts, it will go into the failed state — otherwise known as the dead-lettered state — where we can retry it programmatically or within the dashboard.
#Challenges with multi-step workloads
This is a great step, but it can still be improved! Consider if provisionUserResources is working fine but addUserToBilling is down. The retries will call both functions again because of how it’s defined.
In Async Workloads, it’s important to ensure stateful logic is idempotent. Given this, retries that call provisionUserResources multiple times shouldn’t have a duplicative effect but it can be time consuming and waste resources.
What we want is to allow different parts of the workload to run, fail, and retry in isolation - without repeating any successful work. This is where steps come into the picture.
#Introducing steps into workload functions
A “step” is a discrete sub-process of the larger Async Workload. Steps have unique identifiers and the results are serializable to JSON.
When using steps, the discrete sub-process of the workloads are being defined and the results are assigned to that step’s id. This means, if a step has already happened on a retry, it’s not performed again.
Here is an example:
import { asyncWorkloadFn, AsyncWorkloadEvent, AsyncWorkloadConfig } from "@netlify/async-workloads";
export default asyncWorkloadFn(({ step }: AsyncWorkloadEvent) => {  const stepA = await step.run("part-A", () => {    // ...    return { initialResults: ["hey-a"] };  });
  const stepB = await step.run("part-B", () => {    if (stepA.initialResults.length > 0) {      // ...    }
    return { finalResults: {} };  });});
export const asyncWorkloadConfig: AsyncWorkloadConfig = {  events: ["run-parts"],};
Here’s how this works:
step.runidentifies theidand the step function. The result is awaited, sostepAis the return value of the step function calledpart-A.- After a step function has completed, it’s value is memoized and this step function does not have to be run again on future retries. The
step-Afunction will not be invoked again within this workload, even if the workload needs to be retried. - After each step completes, the workload is reinvoked with the memoized data, allowing for each step to start from a clean state and to have the full duration of the serverless function.
#Improving the provisioning example
Let’s go back to our provision-and-bill workload and use steps to improve it.
import { asyncWorkloadFn, AsyncWorkloadEvent, AsyncWorkloadConfig } from "@netlify/async-workloads";
export default asyncWorkloadFn(({ eventData, step }: AsyncWorkloadEvent) => {  // get the user data  const { user } = eventData;
  const resources = await step.run("prov-resources", () => {    return provisionUserResources(user);  });
  await step.run("bill-for-resources", () => {    return addUserToBilling(user, resources);  });
  // inform the system this user is fully set up  await updateUserState("ready", user, resources, billing);});
export const asyncWorkloadConfig: AsyncWorkloadConfig = {  events: ["provision-and-bill"],  // optionally, we can ensure a user is always provided before allowing this  // workload to be invoked.  eventFilter: (event) => {    return event.eventData.user !== undefined;  },};
Defining the discrete steps within our workload, we can see the key async processes that happen and when one of them fail, any that have completed will use their respective memoized result.
If billing is down for an extended period of time, this workload would retry on its backoff schedule and prov-resources would not run again for this workload.
This function is now much more resilient to transient issues, easier to scale, and control, helping you meet the demands and growth of your users.
#Incorporate a product change request
With our new Async Workload function in place, let’s discuss one more addition: the product team requests the following change:
“For free users, wait 3 days before the resources can be accessed.”
We now need to add a “wait time” for non-paying users so that we can prioritize the paying ones and offer an additional incentive to upgrade their plan. In traditional server work, this nuance of deciding when to do a sub-process based on user parameter can be surprisingly complex.
This is what it would look like for Async Workloads.
import { asyncWorkloadFn, AsyncWorkloadEvent, AsyncWorkloadConfig } from "@netlify/async-workloads";
export default asyncWorkloadFn(({ eventData, step }: AsyncWorkloadEvent) => {  // get the user data  const { user } = eventData;
  const resources = await step.run("prov-resources", () => {    return provisionUserResources(user);  });
  await step.run("bill-for-resources", () => {    return addUserToBilling(user, resources);  });
  if (user.plan === "free") {    await step.sleep("wait-period-non-paying", "3d");  }
  // inform the system this user is fully set up  await updateUserState("ready", user, resources, billing);});
export const asyncWorkloadConfig: AsyncWorkloadConfig = {  events: ["provision-and-bill"],  // optionally, we can ensure a user is always provided before allowing this  // workload to be invoked.  eventFilter: (event) => {    return event.eventData.user !== undefined;  },};
All we needed to do for this function to support this product request is to delay the step of marking the user as “ready” for 3 days. That’s as simple as telling the Async Workload to “sleep” for that time.
#Delaying steps with sleep
Sleeping is a special form of workload step that just waits for the provided period of time.
That’s it! We’ve taken this concept of waiting mid-process, which can turn into a complex refactor and a challenge to test and made it 3 lines of code.
#Taking this forward
At this point, we’ve shown a lot of the key features of Netlify’s Async Workloads and we’ve showcased how all of this is unlocked with so little effort on the developer side. No infrastructure to manage, no queues to stand up. Just install and start writing.
From here, there’s a lot more to explore with Async Workloads. They can be typed, events scheduled for the future, APIs to manage them, and more. Check out the docs and start writing durable functions with Async Workloads.
#Learn more
For more details and full docs, see the Async Workloads documentation.