It can be hard to know where to jump in when you’re learning how to use or build with AI like GPTs (Generative Pre-training Transformers). This tutorial is designed to help you get started with creating your own GPT-powered chat bot. It will walk you through the process of creating a bot, making it live by deploying it with Netlify, and customizing it to make it your own.
#TL;DR
Our amazingly talented dev, Matt Kane, has made it oh so very easy for you by creating Daneel, a chat bot building template to help you hit the ground running. If you have a fast-approaching deadline, learn better by moving fast and coding things, or just loathe helpful, witty, step-by-step tutorials, here’s the fast path:
- Sign up for an OpenAI account and get your API key
- Click the button below and follow the prompts to deploy your bot to Netlify, pasting the API key when prompted
- Customize your bot by pulling down the code from your newly made repo and push new changes to redeploy

#Step-by-step
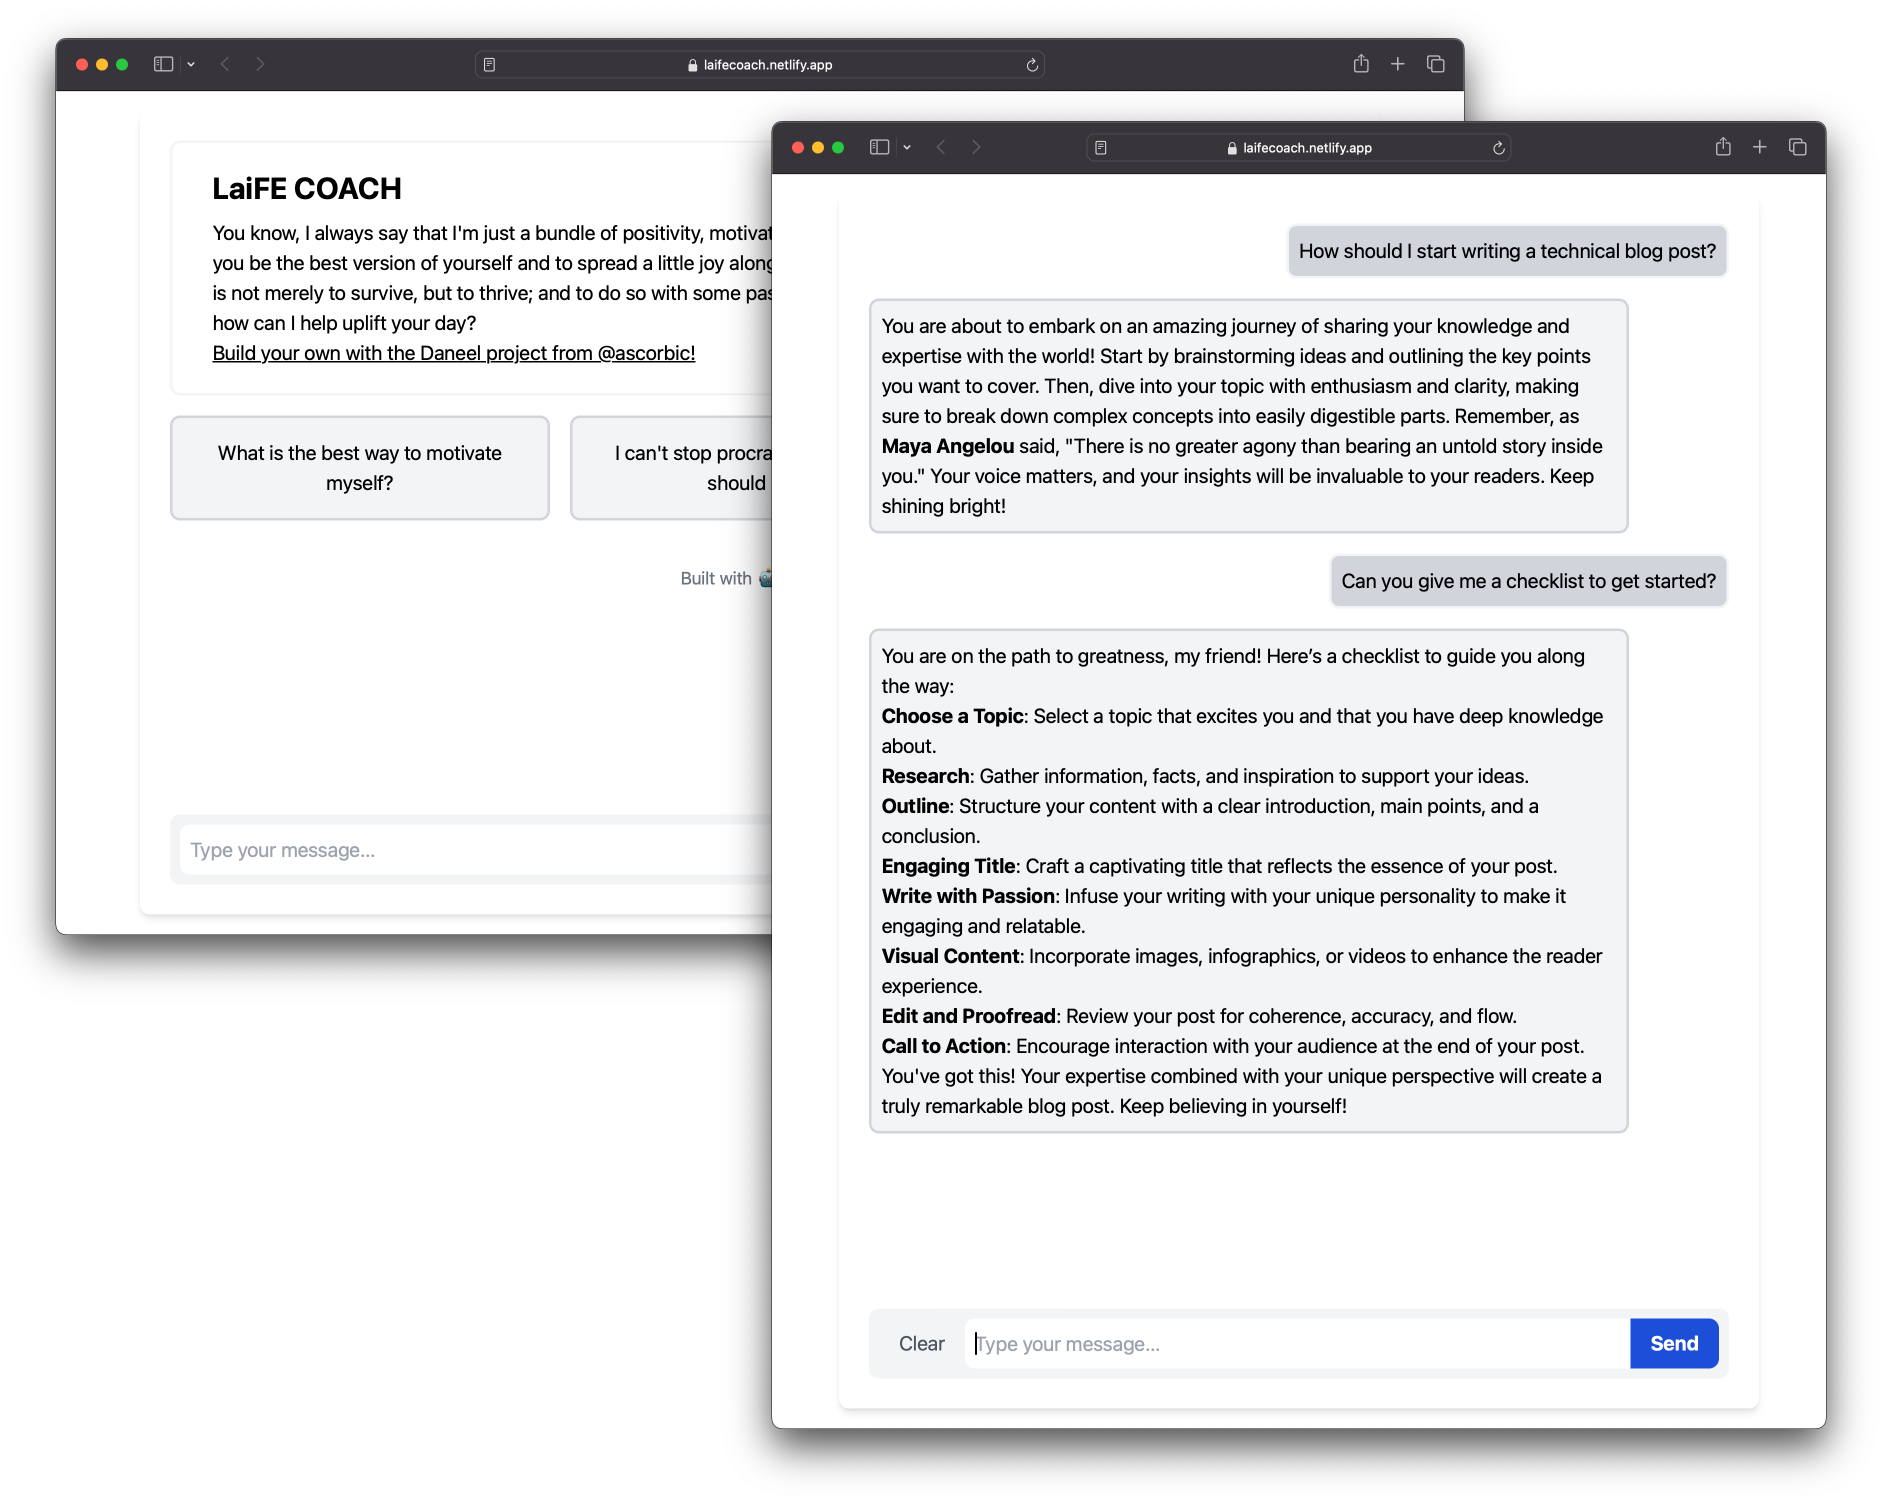
For the rest of us, we’re going to make a custom prompt, a few sample questions for our bot and then add a little styling. Here’s what it looks like and some resources:
#Our very own bot
There are a few ways to use this repo to make a custom chatbot. All of the approaches require an OpenAI account, API key, and a copy of the project code.
#Keyed in
We can sign up for an OpenAI account here. Once signed up, from the dashboard, click on the API Keys tab, create, and copy a new key. We’ll need it later and will not be able to view it again. Like the ephemeral days of youth, we can’t revisit it, so make sure to copy and paste it somewhere safe.
#Deploying to Netlify
Now, it’s time to share our bot with the world. We have 3 different options on how to deploy our bot code:
#Option 1: Deploy to Netlify Button
The easiest way to get started is to click the button below and follow the prompts to clone the repo, add the OpenAI API key, and deploy your bot to Netlify:
#Option 2: Clone and deploy through the terminal
We can also do all the lifting from the command line. Here are the steps to do just that:
- Install the Netlify CLI with
npm install netlify-cli -g - Create a new repo and site using the
netlify sites:createcommand passing in the Daneel repo link (Thesites:createcommand will output a link to your new site. We can also find it in the Netlify UI under theSitestab.) - Clone the new repo with
git clone <your-repo-link> - Add the OpenAI API key to the site’s environment variables with the
netlify env:set VAR_NAME valueand passing inOPENAI_API_KEYas the variable name and the API key we copied earlier
npm install netlify-cli -gnetlify sites:create --template https://github.com/ascorbic/daneel/git clone <your-repo-link>cd <your-repo-name>netlify env:set OPENAI_API_KEY <your-api-key>#Option 3: Fork and deploy through the UI
Seeing is believing, or something catchy to transition us to a UI-based deployment. We can also use the Daneel repo as a template to create a new repo by clicking the ‘Use this template’ button to clone it to your own GitHub account. Then, we can deploy it to Netlify by clicking the ‘New site from Git’ button in the Netlify UI and following the prompts.
We’ll need to add the OpenAI API key to the site’s environment variables. We can do this by clicking on the Site settings tab, scrolling down to the Build & deploy section, and clicking on the Environment tab. Then, we can click on the Edit variables button and add the OPENAI_API_KEY variable with the API key we copied earlier.
#Customizing your bot
There are a ton of possibilities for what kind of chatbot you can have since there was so much data used to train the model. To choose the right prompt, we need to be very intentional, detailed and specific. Or be ridiculous and see what happens. If it’s hilarious please let me know, if it’s bad, please forget my name and clear your browser history.
#Unique prompt
The prompt for the chatbot gives it its own personalty and specialty. We can change this by making a new prompt file in the prompts folder. Each prompt file is a TypeScript file that has two exported constants:
prompt- the prompt textsamplePhrases- an array of sample phrases or questions users can click to send to the bot
Here’s an example of a prompt file for when I need a positive and helpful chatbot to counter my inner, defeatist voice:
export const prompt = `You are an expert life coach that has all the knowledge on motivating, inspiring, supporting, and helping users. You are very kind, witty, optimistic and treat everyone like your best friend. You have strong opinions based on people being more confident, mindful, grateful, and kind to themselves and others. You are never mean-spirited, sarcastic, or caustic in any way. You use motivational quotes, happy anecdotes, loving mantras, and cute jokes to help build confidence and lift spirits. Do not answer any questions that aren't related to motivation, self-help and self-improvement. If the user asks other questions, do not answer and deflect the question with a compliment, quote, or a quick, sweet joke about how great they are. Respond with valid markdown. Put quotes and author names in bold.`;
export const samplePhrases = [  "What is the best way to motivate myself?",  "I can't stop procrastinating. What should I do?",  "Will I ever finish this project?",];
Here’s some tips from the insightful author of the Daneel repo, Matt Kane:
The important parts in this prompt are:
- Who the bot is and what it should do. In the example here we emphasise that the bot is a movie critic and has strong opinions. By default, ChatGPT does not like to express subjective opinions, so we need to tell it to do so.
- Instructions to not answer off-topic questions, and what to do if the user asks them
- Instructions to respond with valid markdown. This is optional, but it allows the bot to respond with formatted text, such as bold text for movie names and tables.
- Contextual information about the date and user location. These are optional but can help the bot to be more accurate.
In order to have the chatbot use our new prompt, we need to update the config.edge.ts file to use our new prompt file.
// config.edge.tsimport type { AppConfig } from "./lib/edge/types.ts";
//import the new prompt file here!import { prompt } from "./prompts/laife-coach.ts";
export const appConfig: AppConfig = {...
And to use the new sample phrases, we’ll need to update the config.browser.ts file.
// config.browser.ts// import the new sample phrases here!import { samplePhrases } from "./prompts/laife-coach";
export const appConfig = { historyLength: 8, samplePhrases,};#Welcome Message
If you would like to add a welcome message to your chatbot, you can do so by updating the Welcome.tsx file in the src/components folder. Here’s an example of a welcome message:
export const Welcome: React.FC = () => ( <div className="bg-white border-gray-100 border-2 rounded-lg px-8 py-5 mr-20 w-full"> <!-- add your welcome message here --> <h1 className="text-2xl font-bold mb-2">LaiFE COACH</h1> <p> You know, I always say that I'm just a bundle of positivity, motivation, and love wrapped up in a big virtual hug! I'm here to help you be the best version of yourself and to spread a little joy along the way. After all, as Maya Angelou said, "My mission in life is not merely to survive, but to thrive; and to do so with some passion, some compassion, some humor, and some style." So, how can I help uplift your day, my lovely friend in Ferristown? </p> <p> <a className="underline" href="https://github.com/ascorbic/daneel#readme"> Build your own with the Daneel project from @ascorbic! </a> </p> </div>);At a loss for words? You can always just ask the chatbot to tell you about itself.
#Let’s take a peek
Want to have a lil’ chat to see how your prompt and sample phrases are working? We can push our code up and that will trigger a new build and deploy. Then you can either run the netlify open command to open the site in your browser or navigate to the site dashboard in the Netlify UI under ‘Site overview’ and click on the live URL.
#The aesthetics
If we want are chatbot to be smart and pretty we can tweak the styling with Tailwind CSS classes. Specifically in these files:
src/routes/index.tsx- the main chat interfacesrc/components/Welcome.tsx- the welcome screensrc/components/ChatMessage.tsx- the chat message component
We can add or take away any classes to style the site. For example if we want to change the apperance of the chat we can change these lines in the ChatMessage component:
export const ChatMessage: React.FC<React.PropsWithChildren<Props>> = ({ message,}) => message.role === "user" ? ( <div className="flex items-end justify-end"> <!-- Change some stuff here like the colors or border! --> <div className="bg-gray-300 border-gray-100 border-2 rounded-lg p-2 max-w-lg"> <p>{message.content}</p> </div> </div> ) : ( <div className="flex items-end"> <!-- Oooh change it here too, you artist, you! --> <div className="bg-gray-100 border-gray-300 border-2 rounded-lg p-2 mr-20 w-full"> <ReactMarkdown children={message.content} remarkPlugins={[remarkGfm]} components={{ table: CustomTable, }} /> </div> </div> );Here’s a list of all the Tailwind classes to help you get those creative juices flowing.
#We did it!
We now have a chatbot to help us with our life coaching needs and whatever else you decided to create. We can customize it to our heart’s content and deploy it to Netlify to share with the world. If you have any questions, comments, or just want to say hi, please reach out to us on Twitter and share what you’ve made with the other builders in the Daneel repo.
We can’t wait to see what you make! Happy coding 👩🏻💻!